
Table of Contents
You are going to create one other version of the model with a different polygon count because the sculpted statue model is too detailed for most real-time applications.
The lower resolution model is created with a technique called retopology or retopo for short. This word comes from "remaking topology".
Export
- Select the sculpted model in the Layout workspace.
- Menu bar -> File -> Export your model as Wavefront (.obj)-file and name it HighPolyStatue. Make sure to select the model and choose Selection Only in the export settings.
Instant Meshes
To speed up retopo, that you don't need to create the whole mesh by hand, you can use a tool to automatically create a basic retopo for you. This automatically created mesh will be the base to optimize it by hand.
- Download and install Instant Mesh. Optional: Also add the Datasets to the app folder to get some more examples.
- Open Instant Meshes and click Open mesh -> PLY OBJ and select your HighPolyStatue.obj file.
- To navigate you
- left mouse button to rotate
- right mouse button to move
- mouse wheel to zoom
- Set the Target vertex count to about a quarter of the quad faces count you are aiming for in the final retopo. I'd recommend aiming for about 15k faces, so set the slider to about 3.6k.
- In the Orientation field section click the ( upper ) Solve button for a retopo mesh flow preview. The colorful lines show the edge flow of the later generated mesh.
- Use the comb tool to tweak the flow of the orientation field. For example, use the comb tool to draw a circle around an eye or belly button for a smoother mesh edge flow.
- In the Position field section click lower Solve for a very basic mesh sketch.
- Use the brush tool to even further tweak the flow of the mesh sketch.
- Enable the Export mesh -> Mesh Settings -> Pure quad mesh, set the Smoothing iterations to 5, and finally, click the Export mesh -> Actions -> Extract mesh button to generate the mesh.
- Export mesh -> Save the mesh as LowPolyStatue.obj.
MeshLab
Another less uniform but more precise way to automatically create your basic retopo is to use MeshLab's filters.
- Open MeshLab and menu bar -> File -> Import Mesh... -> HighPolyStatue.obj
- Use the following menu bar -> Filters ->
- Smoothing, Fairing and Deforming -> HC Laplacian Smooth
- Remeshing, Simplification and Reconstruction -> Simplification: Quadric Edge Collapse Decimation -> Target number of faces: ~1 - 10%
- Optional for high face counts: Smoothing, Fairing and Deforming -> HC Laplacian Smooth
- Export the mesh with menu bar -> File -> Export Mesh As... -> LowPolyStatue.obj
Import
- Rename the Outliner Editor -> Collection with the sculpted model Sculpted Statue Collection. Create another Outliner Editor -> Collection and name it Retopo Statue Collection and select it.
- In Blender Menu bar -> File -> Import and select the file LowPolyStatue.obj. The imported low poly statue should be at the same location as the sculpted statue and should be inside the Retopo Statue Collection.
- Name the retopo statue Statue_low. The postfix _low is really important.
- Switch to Modeling workspace and select all vertices. Then right-click the model and in the context menu select Clear Sharp.
- Save the statue project as BasicRetopoStatue.blend.
Retopo the High Poly Model
Some parts of the low-resolution retopo model made automatically can be improved with handmade retopo.
Make sure you only create uniform TODO quad polygons. No triangles, no n-gons.
First, make sure both models, the high polygon sculpt and the low polygon instant mesh have the exact same pivot point. If not set the pivot point of the instant mesh to the pivot point of the sculpted statue.
Second, delete the parts of the retopo statue you don't like because they look unrealistic and blockish. Disable the Sculpted Statue Collection to see the RetopoStatue.
Prepare
Then replace these parts with a detailed and realistic handmade retopo:
- Apply Object Transform: To apply the object transform to the RetopoStatue switch to Layout workspace in the 3D View. Then select it and click 3D View's menu bar -> Object -> Apply -> All Transforms.
Make sure to enable Location as well in the Operator Panel. This is important to for example get proper scaling and to remove doubled vertices. - To see the RetopoStatue's mesh, even when it is behind the sculpted statue activate Properties Editor -> Object tab -> Viewport Display -> In Front of the RetopoStatue.
- TODO MOVE Switch to Modeling workspace in the 3D View and make sure Proportional Editing Objects is disabled.
- Enable the Snap ( magnet symbol ) tool with Shift + TAB and select Face as Snapping type to snap to faces and not to e.g. vertices because this wouldn't be precise enough. Then disable Project onto Self and enable Project individual elements on the surface of other objects that all selected vertices of the handmade retopo snap to the sculpted statue's surface.
- To make sure the optimized retopo clings to the sculpted model as good as possible you need to shrinkwrap it to the high-resolution statue's surface.
- Select the retopo model and switch to the Properties Editor -> Modifiers tab and pick an Add Modifier -> Shrinkwrap modifier.
- Enable On Cage.
- Set the Target of the modifier to the sculpted statue.
- Leave the Modes Nearest Surface Point & On Surface.
- Set the Offset to 0.00.
- Do not Apply the modifier.
- To know the statue from the retopo better select the retopo and add a new material named RetopoMat with another color than the statue: Properties Editor -> Material tab -> + New. Set your color in the Viewport Display section and the Roughness to 0.100.
- Optional: To see both statues better and all the time activate X-Ray: 3D View menu bar -> Show X-Ray. In this mode, you can also select vertices that are normally hidden by other faces.
Default Tools
- To draw a mesh in the 3D View with the Annotate tool, that works like a pen, you can use the activated Bsurfaces add-on. It can be found on the left side in the Modeling workspace -> Tool Shelf ( T ) -> Annotate. To use it you need to:
- Click the Annotate tool.
- Open the Properties panel ( N )
- Set the Tool tab -> Active Tool -> Placement to Surface
- Initialize the Bsurfaces add-on: Edit tab -> Bsurfaces -> Retopology: select the RetopoStatue. And disable Automatic join.
- Draw strokes by pressing and holding the left mouse button. Switch to the Annotate Eraser tool by click and hold the left mouse button on the Annotate tool to delete the drawn.
- Draw uniform polygon quad webs and convert them to a (sub)mesh with the Properties panel ( N ) -> Edit tab -> Bsurfaces -> Add Surface. Quads instead of triangles are more flexible for now. ( Shown in the animated image below. )
- Convert selected vertices to an edge or a face by pressing the F key.
- Alt + F and 3D View menu bar -> Face -> Grid Fill ( Tip: Add it to the Quick Favorites with right-click to the menu button. ) can help you to fill holes with faces. Although both don't very well for complex holes.
- Use the LoopTools to connect two mesh pieces or a grease pencil stroke and a mesh or fill complex holes.
- Select the outside edges of both pieces or the opposite edges, ideally with the same edge count, you want to connect to each other, then right-click to open the context menu -> LoopTools -> Bridge. ( Shown in the animated image below. ) If the bridged connection is twisted set the Twist count in the Operator Panel to e.g. 1 or -1 or enable Reverse. You can also change the Segments count to add polygons.
Right-click -> Open image in new tab to enlarge.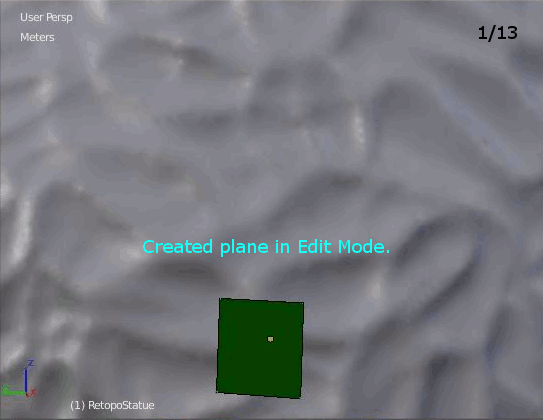
- To move extruded edges to the Annotate pencil stroke change the following settings in the Properties panel ( N ) -> Edit tab -> LoopTools -> Gstrech options: Method: Spread and add the Delete Annotation Strokes to your Quick Favorites.
Then you can select edges, extrude these with the E key and draw one line with the Annotate pencil. Finally, right-click to open the context menu -> LoopTools -> Gstrech to move the selected edges. - Use the LoopTools -> Space tool to space out selected vertices evenly.
- Select the outside edges of both pieces or the opposite edges, ideally with the same edge count, you want to connect to each other, then right-click to open the context menu -> LoopTools -> Bridge. ( Shown in the animated image below. ) If the bridged connection is twisted set the Twist count in the Operator Panel to e.g. 1 or -1 or enable Reverse. You can also change the Segments count to add polygons.
- You can automatically merge vertices and edges that are nearby ( called doubles ) with Alt + M -> By Distance ( Quick Favorite ) or merge them automatically when they are closer to each other than a specific Threshold by enabling Properties panel ( N ) -> Tool -> Options -> Auto Merge. Set the Merge Distance / Threshold to for example 0.05m - 0.01m.
- Create new vertices / edges with Ctrl + right-clicks after selecting an existing vertex / edges.
- If you have repeating shapes like spikes you've created with a sculpting brush, just retopo the shape once and select & duplicate it with Shift + D and move / rotate as you need it.
- Small dents don't need to be retopologized. Just cover them with polygons and the baked normal ( and displacement ) textures will mimic and add these dents later.
- To retopologize e.g. the eyes or other very detailed, round areas use a spider-web-like geometry.
- Add more detail with CTRL + R and move the mouse to select the loop cut position. Use the mouse wheel to higher or lower the number of cuts. Click the left mouse button to set the number of cuts and change the exact position of the cut(s) by moving the mouse. Click the left mouse button again to apply the cut(s).
- You can also add more detail by loop selecting edges with ALT + right-click and then use the Bevel feature with CTRL + B or tool to round edges. Use the mouse wheel to add detail. The bevel tool is a very important feature for hard surface modeling!
- The Insert tool ( I key ) is also very helpful to add details and even get rid of weird shading errors caused by "wrong" normals.
- Remove detail by selecting the edge(s) you want to delete in Edge select mode: Press the X key and click Dissolve Edges
RetopoFlow
Another way to fill holes in your retopo mesh is to use RetopoFlow. You can get RetopoFlow for free at GitHub.
Check out this video about RetopoFlow 3 beta for now. I'll add more details when it is released.
Check & Fix Mesh
In the last step make sure that there are no holes in the retopo model and that the polygons don't consist of more than four vertices in Vertex or Edge select mode.
To fix possible polygons / faces with more than the four vertices ( called n-gon ):
- In Edit Mode ( Modeling workspace ) while hovering your retopo model with the mouse cursor press the L key to select all connected vertices. Connect or delete all other vertices if there are any.
- Then make sure that there are no double vertices at the same location. Clean the mesh up with 3D View menu bar -> Mesh -> Clean Up -> Merge By Distance with a Merge Distance set to 0.001m.
- Then unselect all polygons with the Alt + A.
- In the 3D View menu bar -> Select -> Select All By Trait -> Select Faces by Sides and in the Operator panel set Number of Vertices: 4 and the Type: Not Equal To. All selected polygons are n-gons with more than four vertices.
- Delete these with X key -> Only Faces. Then you need to fix their polygon count to four by selecting four vertices or two edges you want to connect and hit the F key to add a quad face. In Blender's status bar at the very bottom, you can see how much vertices are selected and n-gons you have.
- After your fix, run the check again and the count should show zero.
To fix holes in the mesh:
( This is also an important check if you want to print your statue with a 3D printer at a later date. )
- To see and select all holes or double faces go to the 3D View menu bar -> Select -> Select All by Trait -> Non Manifold.
- You need to fix the holes by selecting four vertices or two edges you want to connect and hit the F key to add a face.
- Run the check again to find the next hole and close it until your mesh is manifold.
Save the retopo statue project as RetopoStatue.blend.
Apply Object Transform
This is important to get, for example, proper UV mapping.
To apply the object transform switch to Object Mode the 3D View and select the retopo statue. Then click 3D View menu bar -> Object -> Apply -> All Transforms. Then also apply the transform to the sculpted statue.
Save this statue project as AppliedTransfromStatue.blend.
Check the Normals
Because most materials in the virtual world are only one-sided, you need to check if the normals point to the outside of the model. Otherwise, you'd be able to look inside your statue or get very dark and light areas on a normally uniform surface.
- Switch to Edit Mode to check the normal directions of your retopo statue.
- In the 3D View menu bar -> Overlays -> Normals -> enable the Display face normals as lines-button.
- If not all normals point to the outside of the object: Select all vertices, edges, or faces with the A key. Then recalculate the outside with Alt + N -> Recalculate Outside. You can also select some faces and flip their normals manually with Alt + N -> Flip Normals.
- When all normals point to the outside deactivate the 3D View menu bar -> Overlays -> Normals -> enable the Display face normals as lines-button.
Save this statue project as NormalStatue.blend.